
If you are new to the OpenStack Community and want to start the contribution, this document can help you in a quick way. OpenStack does not use github pull request instead it uses Gerrit for code collaboration tool. Also, there is some accounts setup required for using the Gerrit system. This guide will quickly help you to set up those accounts and the minimal steps.
Step1: Set up accounts
To get started, first set up the required accounts.
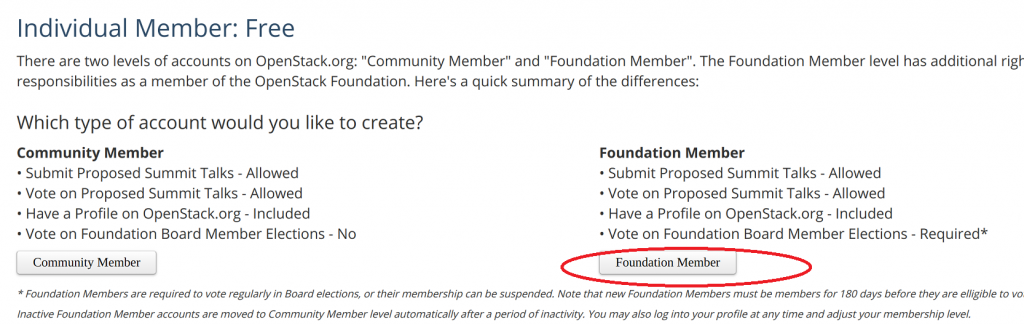
Set up your OpenStack Foundation account
- Go to the OpenStack Foundation sign up page.
- Under individual members, click the Foundation Member button.
- Few tips for filling the form:Use the same e-mail address at every step of the registration procedure.
- Add your affiliation information if you want otherwise you are contributing on behalf of your ‘Individual Contributors’.
After you submit the application, you will get an email once it is approved.
Set up your Task Tracker account
- Go to the https://login.launchpad.net/.
- If you don’t have a ubuntu One Account, click the “I don’t have an Ubuntu One account“.
- Use the same email address that was used during the OpenStack Foundation account setup.
- Fill all information and ‘Create Account’.
Install Git
Use the same email address that was used during the OpenStack Foundation account setup.
Mac OS
- Go to the Git download page and click Mac OS X.
- The downloaded file should be a dmg in your downloads folder. Open that dmg file and follow the instructions on screen.
- If you use the package manager Homebrew, open a terminal and type:
brew install git
Linux
- For distributions like Debian, Ubuntu, or Mint open a terminal and type:
sudo apt install git - For distributions like RedHat, Fedora 21 or earlier, or CentOS open a terminal and type:
sudo yum install git - For Fedora 22 or later open a terminal and type:
sudo dnf install git - For SUSE distributions open a terminal and type:
sudo zypper in git
Configure Git
git config --global user.name "Firstname Lastname"git config --global user.email "[email protected]"
Setup Your Gerrit Account
- Visit OpenStack’s Gerrit page and click the sign in link.
- You will be prompted to select a username. Choose and type your username carefully. Once it is set, you cannot change the username.
- From here on out when you sign in to Gerrit, you’ll be prompted to enter your Launchpad login info. This is because Gerrit uses it as an OpenID single sign on.
- Sign Individual Contributor License Agreement. If you want to contribute from company then ask your company to sign the Company CLA.
- In Gerrit’s settings, click the “New Contributor Agreement” link and sign the agreement.

Setup SSH Keys
- In order to push patches to Gerrit we need to have a way to identify ourselves and ssh key is the one way to authenticate. You can submit patches from any machine but you need to update the ssh key of that machine.
- Generate SSH Key Pairs:
ssh-keygen -t rsa - Copy Public Key:
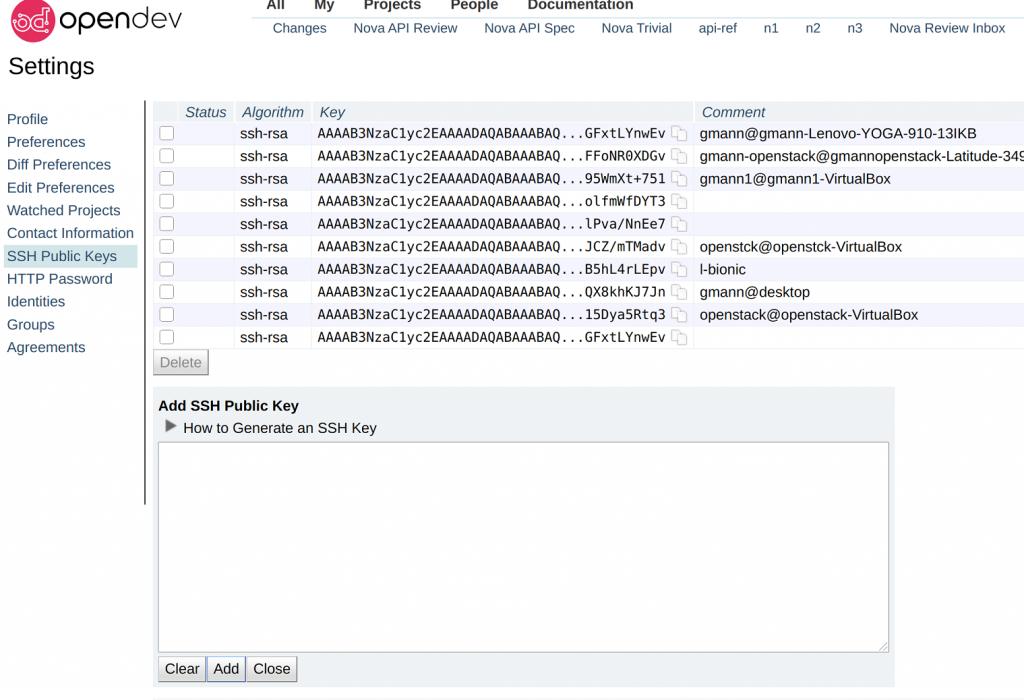
cat ~/.ssh/id_rsa.pub - Add Public Key Into GerritGo to Gerrit’s SSH Public Keys settings.
- Click the ‘Add Key’ button.
- Paste the public key into the Add SSH Public Key text box and click Add.
Install git-review tool
- pip install git–review
- If you don’t have pip installed already, follow the installation documentation for pip.
- git config —global gitreview.username <username>
Step 2: Push your change
Clone the repository
- Clone the repo which you want to push the changes:
git clone https://opendev.org/openstack/<PROJECT_NAME> - Here you can find all the OpenStack projects and repo under those projects.
Create your local branch to do the changes
git checkout -b <branch_name>
Do the changes in code and perform all required unit or functional tests
- To check the files that have been updated in your branch:
git status
git add -A
Write commit changes
Refer to this document for the commit message format and tips.
git commitorgit commit --amend (if you are ammending the previously written commit msg)
Submit your changes
git review
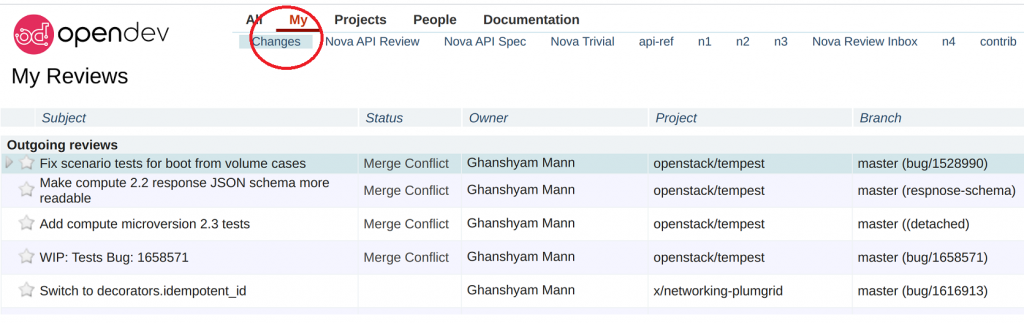
Tracking your changes
You can track the submitted changes at Code Review. After logging in, click on ‘My’ then ‘Changes’ and there you can see all your changes.
Step3: Practice the above steps using Sandbox Project
To make sure everything is set up correctly or to understand the workflow without trying it on actual projects, you can practice in a Sandbox using the How to Use the Sandbox Projects Guide. Sandbox project is just for practice so do not hesitate or worry about anything.
For more details on OpenStack community contributor, please refer to The OpenStack Contributor Guide or ping me on IRC (#openstack-dev or openstack-upstream-institute channels), I am available with ‘gmann’ nickname.


Leave a Reply